Quantcast
Channel: Docs - AIOSEO
Viewing all 404 articles
Browse latest View live

Setting Product Schema Markup in Your Content

$
0
0

All in One SEO Pro lets you add Schema markup for products. This means that search engines can display rich snippets for your products like the example below.

You can set the default Schema Type for your products by going to All in One SEO » Search Appearance » Content Types and clicking on the Schema Markup tab in the content section for your products.

For more detail on this, please see our article on Configuring Schema Settings here.

In this article, we’ll cover the following:

Adding Your Product Information

When you select Product as the Schema Type for your content, you’ll see additional fields when editing your product content where you can enter your product information.

To get started, edit one of your products, scroll down to the AIOSEO Settings section and click on the Schema tab.

Product fields on the Schema tab of All in One SEO

Complete the fields with your product information as described below:

  • Description – enter a description of your product
  • Price – enter the price for your product
  • Currency – select which currency your price is in
  • Price Valid Until – if this is a sale or limited time price then select the date that the price is valid until
  • Brand – enter the brand for your product
  • Availability – choose the availability from the choices in the drop down
  • SKU – enter the SKU for your product
  • Identifier Type – if your product has an identifier then select the type from the drop down
  • Identifier – if you’ve selected an Identifier Type then complete the Identifier field with your product identifier

Adding Product Reviews

Below the product fields you’ll see a Reviews form. You can use this optional form to add details of any reviews that customers have left for this product.

Reviews form in the Schema settings for All in One SEO

Complete the form with the review headline, content, reviewer’s name and the star rating. Click the Add New button to add more reviews.

Using Product Schema with WooCommerce Products

You can use the product schema in All in One SEO Pro with your WooCommerce products.

When you edit a Product, scroll down to the AIOSEO Settings section and click on the Schema tab.

You’ll see a much simpler form that just adds fields for information that is missing in WooCommerce such as Identifier Type, Identifier and Brand.

You’ll also see that there is no Reviews form because we use the reviews from WooCommerce (if you’ve enabled that feature).

All in One SEO also works with the WooCommerce Brands plugin and the Perfect Brands for WooCommerce plugin and will automatically use the brands you set for your products in those plugins.

Using Product Schema with Easy Digital Downloads

You can use the product schema in All in One SEO Pro with Easy Digital Downloads.

When you edit a Download, scroll down to the AIOSEO Settings section and click on the Schema tab.

You’ll see a much simpler form that just adds fields for information that is missing in Easy Digital Downloads such as Brand, Price Valid Until, Availability, Identifier Type and Identifier.

You’ll also see the Reviews form, however, All in One SEO Pro works with the Easy Digital Downloads Reviews plugin and will automatically use the reviews from that plugin.

Please note that the information added in the Products form only appears in the Schema markup in the source code of your content, it does not appear as content visible to visitors on your site.

The post Setting Product Schema Markup in Your Content first appeared on AIOSEO.
Setting Recipe Schema Markup in Your Content

$
0
0

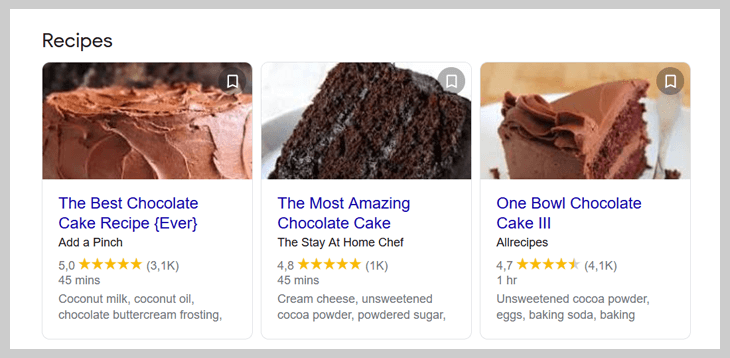
All in One SEO Pro lets you add Schema markup for recipes. This means that search engines can display rich snippets for your recipes like the example below.

You can set the default Schema Type for your recipe content by going to All in One SEO » Search Appearance » Content Types and clicking on the Schema Markup tab in the content section for your recipes.

For more detail on this, please see our article on Configuring Schema Settings here.

Adding Your Recipe Information

When you select Recipe as the Schema Type for your content, you’ll see additional fields when editing your recipe content where you can enter your recipe information.

To get started, edit one of your recipes, scroll down to the AIOSEO Settings section and click on the Schema tab.

Recipe fields in the Schema settings for All in One SEO

Complete the fields with your recipe information as described below:

  • Name – enter the name of the dish
  • Description – enter a short description of the dish
  • Author – enter the name of the person or organization that wrote the recipe
  • Image – upload an image of the dish
  • Dish Type – enter the type of dish
  • Cuisine Type – enter the type of cuisine
  • Time Required – enter the preparation time and cooking time in minutes
  • Amount of Servings – enter the amount of servings the recipe makes
  • Calories – enter the number of calories for the dish
  • Ingredients – enter the name of each ingredient including measurement, i.e. 1 tablespoon of flour
  • Instructions – use the Instructions form to add the steps for making the recipe
  • Rating – enter the average star rating and number of ratings your recipe has received
  • Keywords – enter any other terms such as season, holiday, or other descriptors

Please note that this information only appears in the Schema markup in the source code of your content, it does not appear as content visible to visitors on your site.

The post Setting Recipe Schema Markup in Your Content first appeared on AIOSEO.

Setting Software Application Schema Markup in Your Content

$
0
0

All in One SEO Pro lets you add Schema markup for software applications. This means that search engines can display rich snippets for your software like the example below.

You can set the default Schema Type for your software content by going to All in One SEO » Search Appearance » Content Types and clicking on the Schema Markup tab in the content section for your software.

For more detail on this, please see our article on Configuring Schema Settings here.

Adding Your Software Application Information

When you select Software Application as the Schema Type for your content, you’ll see additional fields when editing your software content where you can enter your application information.

To get started, edit your content, scroll down to the AIOSEO Settings section and click on the Schema tab.

Complete the fields with your software information as described below:

  • Name – enter the name of your software
  • Price – enter the price of your software (optional)
  • Currency – select which currency your price is in
  • Operating System – enter the operating systems your software works on
  • Category – select the category that matches the type of application

Below the software application fields you’ll see a Reviews form. You can use this optional form to add details of any reviews that customers have left for this product.

Complete the form with the review headline, content, reviewer’s name and the star rating. This form only supports one review at this time in compliance with Google’s requirements.

Please note that the information added in the form only appears in the Schema markup in the source code of your content, it does not appear as content visible to visitors on your site.

The post Setting Software Application Schema Markup in Your Content first appeared on AIOSEO.

Setting FAQ Page Schema Markup in Your Content

$
0
0

All in One SEO Pro lets you add Schema markup for FAQs. This means that search engines can display rich snippets for your FAQs like the example below.

You can set the default Schema Type for your FAQ content by going to All in One SEO » Search Appearance » Content Types and clicking on the Schema Markup tab in the content section for your FAQs.

For more detail on this, please see our article on Configuring Schema Settings here.

Adding Your FAQ Information

When you select FAQ Page as the Schema Type for your content, you’ll see additional fields when editing your FAQ content where you can enter your questions and answers.

To get started, edit one of your FAQs, scroll down to the AIOSEO Settings section and click on the Schema tab.

FAQs fields on the Schema tab in All in One SEO

Complete the form with your Question and Answer and click the Add New button to add more FAQs.

Please note that this information only appears in the Schema markup in the source code of your content, it does not appear as content visible to visitors on your site.

The post Setting FAQ Page Schema Markup in Your Content first appeared on AIOSEO.

aioseo_meta_views

$
0
0

Purpose

This filter can be used to filter the meta views that AIOSEO outputs.

The current meta views are:

  1. meta – all general meta tags, including the description, robots meta, etc.
  2. social – all Open Graph and Twitter meta tags
  3. schema – our JSON schema
  4. analytics – our Google Analytics code (deprecated)

Arguments (1)

  1. $views (array) – The meta views.

Example code snippet

The code snippet below is just an example of how this filter can be used. In the example below, AIOSEO is prevented from outputting any data on category archive pages.

add_filter( 'aioseo_meta_views', 'aioseo_filter_meta_views' );

function aioseo_filter_meta_views( $views ) {
   if ( is_category() ) {
      return [];
   }
   return $views;
}

The post aioseo_meta_views first appeared on AIOSEO.

Displaying Additional Twitter Data for Written By and Reading Time

$
0
0

In addition to the standard Twitter meta data for title, description and image, Twitter also supports two additional tags. These are:

  • Written By
  • Estimated Reading Time

These can provide people with additional important information about your content when it’s shared on Twitter.

By default, All in One SEO does not output these additional tags, however, you can easily enable it by following these instructions.

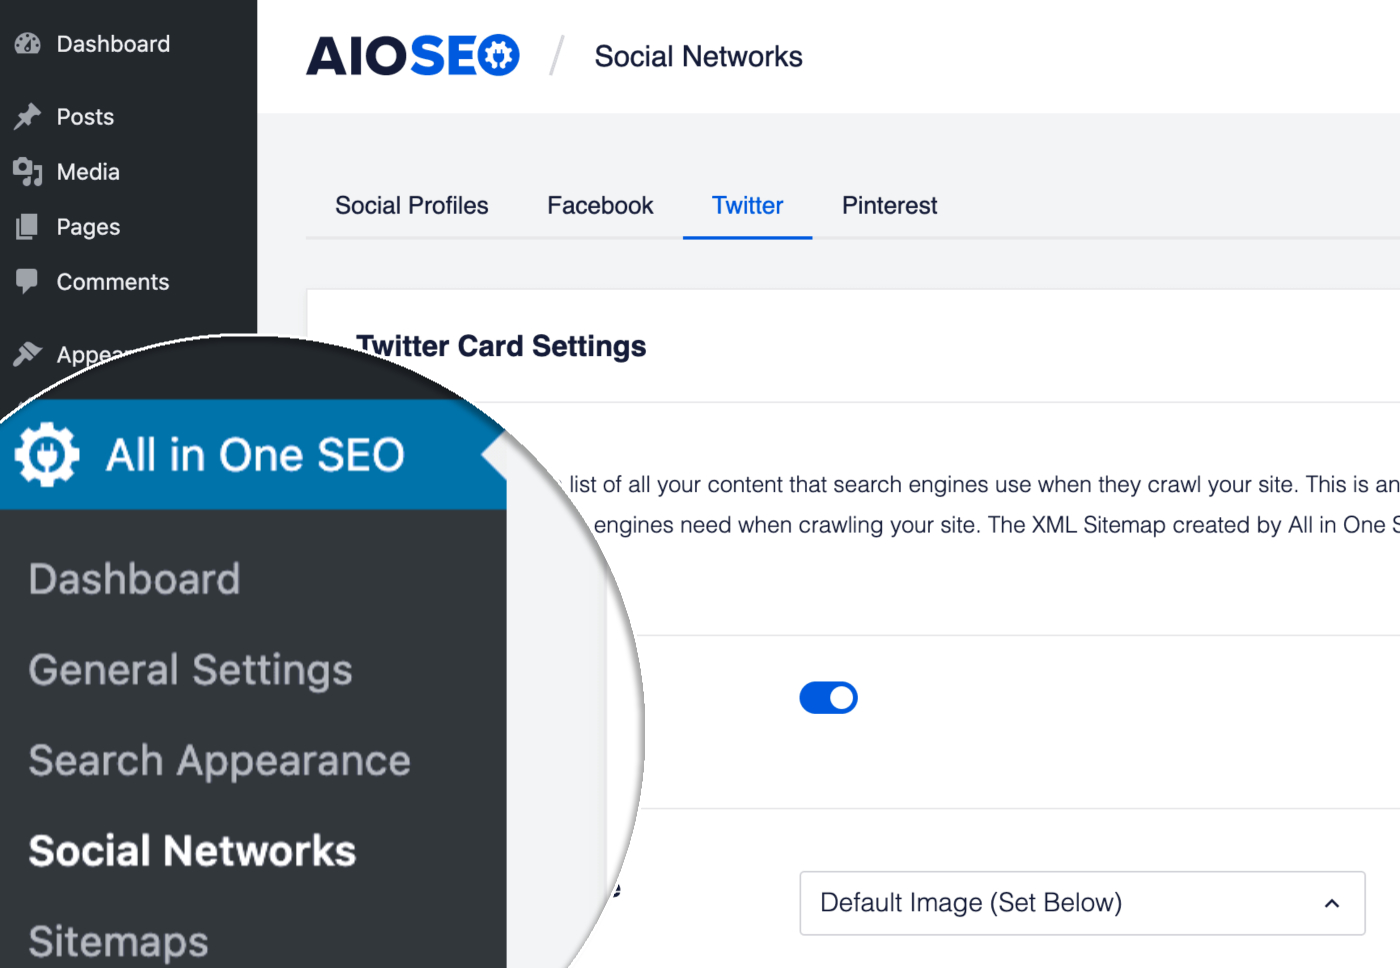
To get started, click on Social Networks in the All in One SEO menu and then click on the Twitter tab.

In the Twitter Card Settings you should see the Additional Data setting.

Set this to Enabled and All in One SEO will output the additional meta tags.

The post Displaying Additional Twitter Data for Written By and Reading Time first appeared on AIOSEO.

aioseo_thumbnail_size

$
0
0

Purpose

This filter can be used to set the size of the image used for the og:image meta tag that All in One SEO outputs.

Arguments (1)

  1. $imageSize (string) – The size of the image All in One SEO outputs. Defaults to “fullsize”.

Example code snippet

The code snippet below is just an example of how this filter can be used. In the example below, All in One SEO is outputting an og:image that uses the large size image.

add_filter( 'aioseo_thumbnail_size', function( $imageSize ) {
    return 'large';
} );

The accepted values are –

  1. fullsize
  2. large
  3. medium
  4. thumbnail
  5. an array specifying the width and height in pixels (e.g. [ 200, 300 ] )

The post aioseo_thumbnail_size first appeared on AIOSEO.

aioseo_disable_link_format

$
0
0

Purpose

This filter can be used to disable the custom link format that All in One SEO adds to the Block Editor and Classic Editor.

Arguments (1)

  1. $disabled (boolean) – Whether the link format should be disabled.

Example code snippet

add_filter( 'aioseo_disable_link_format', '__return_false' );
The post aioseo_disable_link_format first appeared on AIOSEO.

Beginners Guide to Social Networks Settings for Twitter

$
0
0

Are you looking to get started with the Social Networks features in All in One SEO?

This beginners guide will walk you through the simple steps to use these features for Twitter.

Why Use the Social Networks Features?

These days a good presence on social media is just as important as a good presence on search engines.

You maintain this presence using your own Twitter profile, but also through Tweet buttons on your website where visitors can share your content on their Twitter profile.

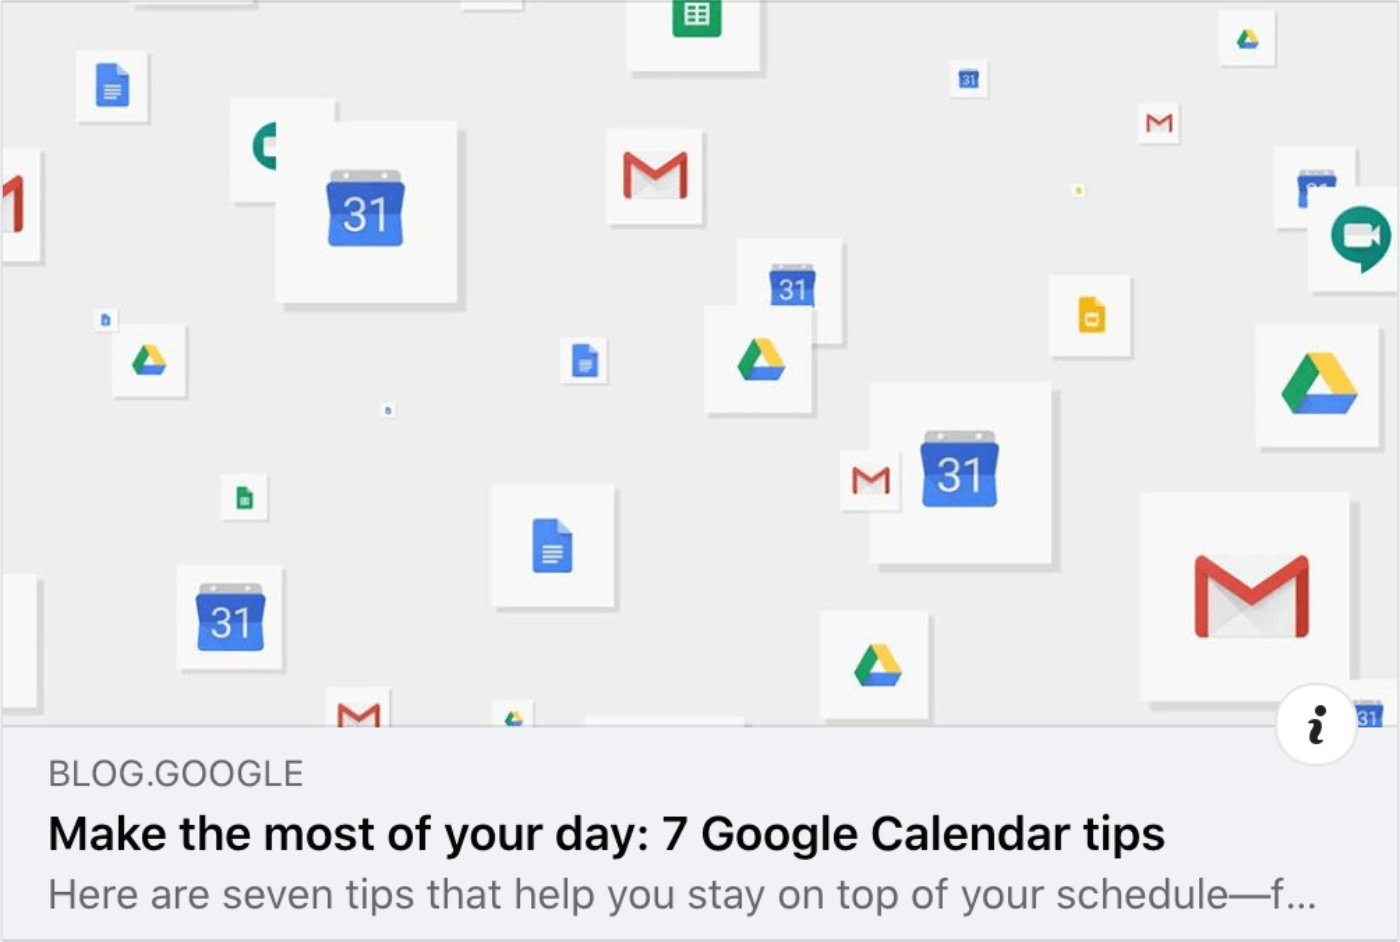
When your content is shared on Twitter, it may be displayed with a title, description and an image like the example below.

Example of a post shared on Twitter

Your goal is to attract the attention of people as they scroll through their Twitter feed and get them to click on your content and visit your site.

The Social Networks features in All in One SEO mean you can control how your content looks on Twitter, increasing the likelihood that people will see your content and click through to your site.

Now that we know why it’s important, let’s look at how we use All in One SEO to control how our content appears on Twitter.

Enabling Twitter Settings

To get started, click on Social Networks in the All in One SEO menu and then click on the Twitter tab.

Social Networks menu item in All in One SEO

The first setting you’ll see is Enable Twitter Cards. Make sure this is enabled.

Enable Twitter Cards toggle in Twitter Setting

Twitter Card Types

Next, we’ll set the Card Type for our content. Twitter uses this to determine the appearance of your content when it’s shared.

Follow these instructions for Setting the Default Twitter Card Type.

Twitter Image Settings

Next, we’re going to choose which image is used when your content is shared on Twitter. Follow these instructions for Setting the Twitter Image Source.

Once you’ve done that, you can set a default Twitter image which will be used as a fall back if no other image is set. Follow these instructions for Setting the Default Twitter Image.

Home Page Settings for Twitter

Now we’re going to move on to setting the title, description, image and card type for your homepage.

Where you set this will depend on whether your homepage is set to display your latest posts, or is set to a static page. If you’re not sure, just go to Settings » Reading on your site and check the Your homepage displays setting.

If your homepage displays your latest posts, then follow these instructions for Setting the Twitter Social Meta When Your Homepage Displays Your Latest Posts.

If your homepage displays a static page, then follow these instructions for Setting the Twitter Social Meta When Your Homepage Displays a Static Page.

Individual Page/Post Settings

Now that we’ve set the Twitter settings for the homepage, let’s set the title, description and image for individual post or page.

Follow these instructions for Configuring the Twitter Settings for Your Content.

The post Beginners Guide to Social Networks Settings for Twitter first appeared on AIOSEO.

Beginners Guide to Social Networks Settings for Facebook

$
0
0

Are you looking to get started with the Social Networks features in All in One SEO?

This beginners guide will walk you through the simple steps to use these features for Facebook.

Why Use the Social Networks Features?

These days a good presence on social media is just as important as a good presence on search engines.

You maintain this presence using your own Facebook Page or profile, but also through Like and Share buttons on your website where visitors can share your content on their Facebook profile.

When your content is shared on Facebook, it may be displayed with a title, description and an image like the example below.

Example of a post shared on Facebook

Your goal is to attract the attention of people as they scroll through their Facebook feed and get them to click on your content and visit your site.

The Social Networks features in All in One SEO mean you can control how your content looks on Facebook, increasing the likelihood that people will see your content and click through to your site.

Now that we know why it’s important, let’s look at how we use All in One SEO to control how our content appears on Facebook.

Enabling Facebook Settings

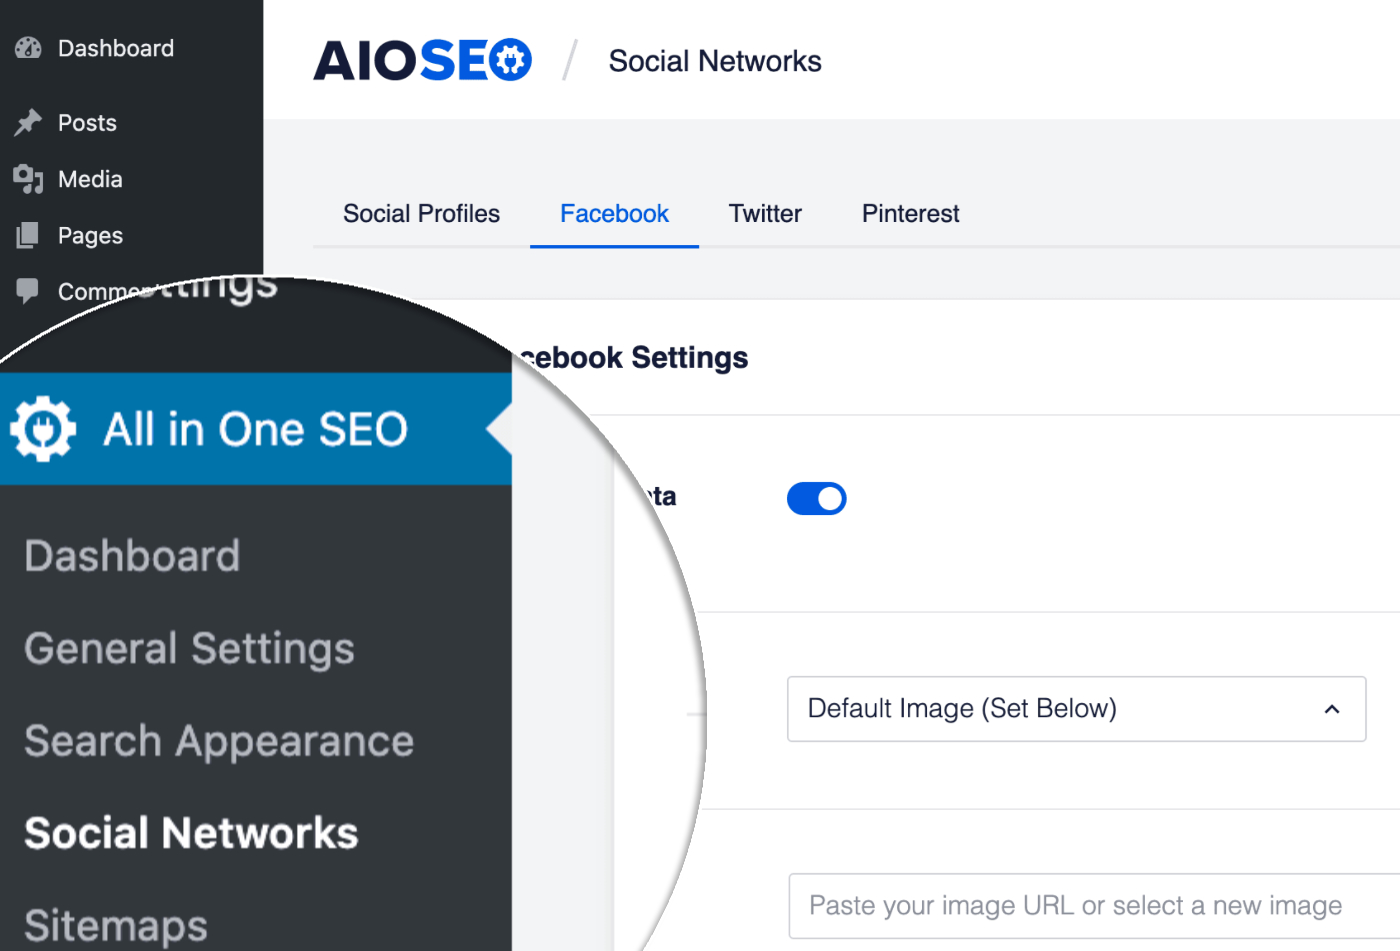
To get started, click on Social Networks in the All in One SEO menu and then click on the Facebook tab.

Social Networks menu item in All in One SEO

The first setting you’ll see is Enable Open Graph Markup. Make sure this is enabled.

Enable Open Graph Markup toggle in Facebook Settings

Facebook Image Settings

Next, we’re going to choose which image is used when your content is shared on Facebook. Follow these instructions for Setting the Facebook Image Source.

Once you’ve done that, you can set a default Facebook image which will be used as a fall back if no other image is set. Follow these instructions for Setting the Default Facebook Image.

Facebook Object Types

Next, we’ll set the Object Types for our content. Facebook uses these to determine the appearance of your content when it’s shared.

Follow these instructions for Setting the Default Object Types for Facebook.

Home Page Settings for Facebook

Now we’re going to move on to setting the title, description and image for your homepage.

Where you set this will depend on whether your homepage is set to display your latest posts, or is set to a static page. If you’re not sure, just go to Settings » Reading on your site and check the Your homepage displays setting.

If your homepage displays your latest posts, then follow these instructions for Setting the Facebook Social Meta When Your Homepage Displays Your Latest Posts.

If your homepage displays a static page, then follow these instructions for Setting the Facebook Social Meta When Your Homepage Displays a Static Page.

Individual Page/Post Settings

Now that we’ve set the Facebook settings for the homepage, let’s set the title, description and image for individual post or page.

Follow these instructions for Configuring the Facebook Settings for Your Content.

The post Beginners Guide to Social Networks Settings for Facebook first appeared on AIOSEO.

How to Create an XML Sitemap

$
0
0

Do you want to set up an XML Sitemap for your site to let search engines know when you publish or change content?

All in One SEO makes this really easy. In fact it’s enabled by default and there’s very little configuration needed.

Here we’ll show you how to review the settings and check your sitemap so that you can be confident it includes all the right content.


What is an XML Sitemap?

An XML Sitemap is a special webpage that lists all of your content. It includes information such as when your content last changed.

It’s an essential part of SEO because it helps search engines find your content and tells them when you’ve changed or removed content.

Search engines use this information to decide what needs to be included and updated in search results.

Without an XML Sitemap, it would take longer for your content to appear on, or be removed from search engines.

It’s very important that you understand what’s included in your XML Sitemap. You should check it frequently to be sure that you’re including the right content, and excluding content you don’t want search engines to see.

Viewing Your XML Sitemap

First, let’s make sure you can view your XML Sitemap.

To get started, go to Sitemaps in the All in One SEO menu.

Sitemaps menu item in All in One SEO

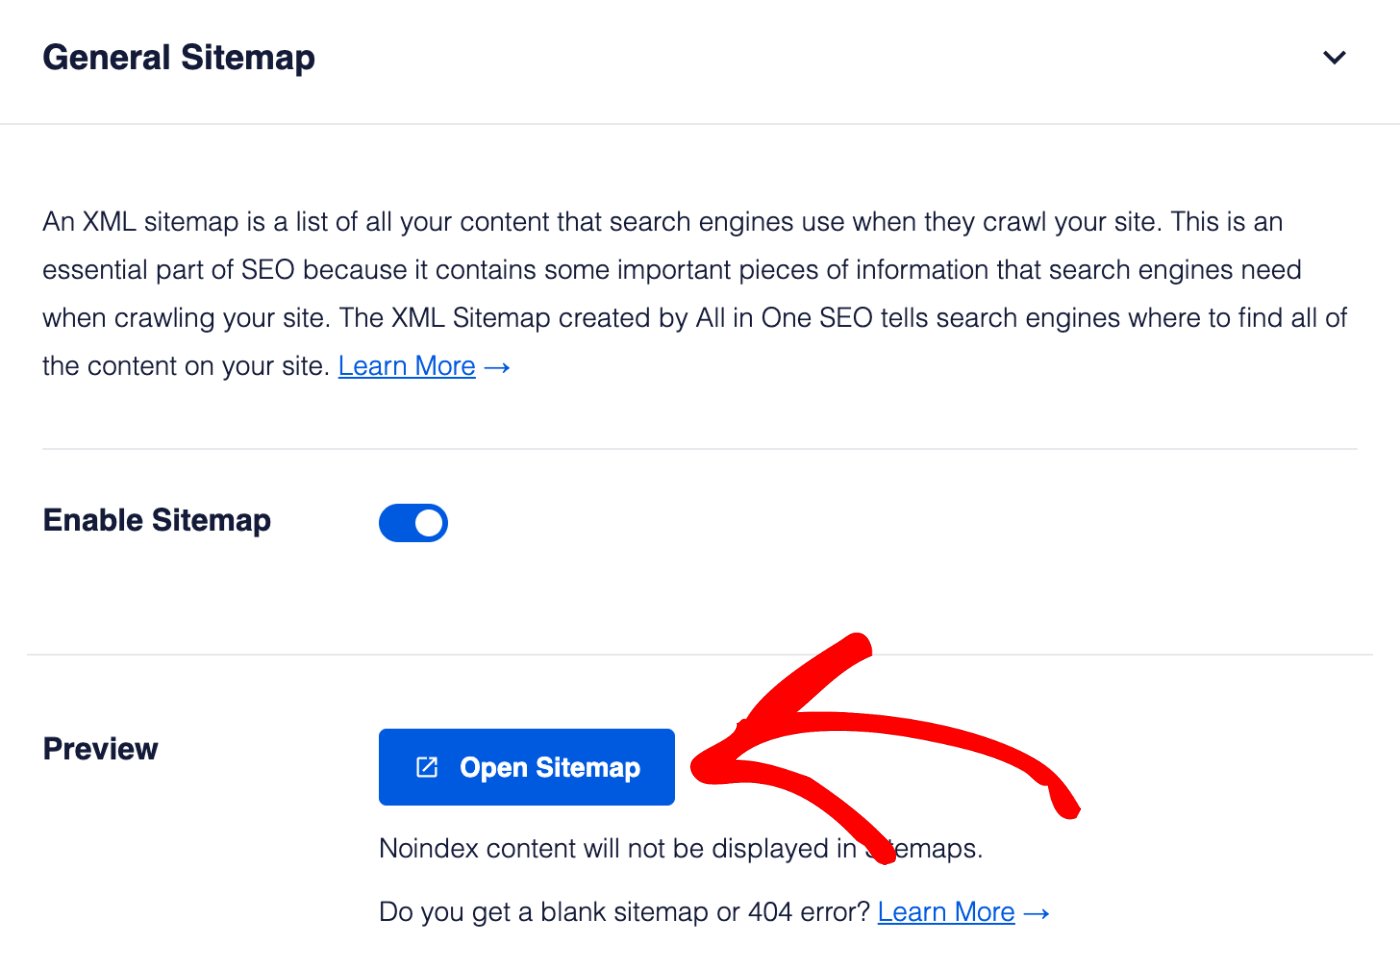
You’ll see the General Sitemap screen and you should see that Enable Sitemap is on. If it’s off, you’ll want to turn it on.

Click the Open Sitemap button to view your XML Sitemap.

General Sitemap settings in All in One SEO

You should see an index page for your XML Sitemap that looks like this:

Example of an XML Sitemap generated by All in One SEO

The index page lists all of the sitemaps for your site. Each sitemap contains a different type of content. For example, above you’ll see there’s one for Posts and one for Pages.

Click on each link in the index to see the list of that content.

Now that you know how to view your XML Sitemap, let’s look at the basic settings.

Configuring the XML Sitemap

Let’s start by deciding whether you want to have an index page for your sitemap.

If your site is very small (less than a few hundred URLs) then you may not need an index page. You can go ahead and set Enable Sitemap Indexes to Disabled.

Enable Sitemap Indexes setting in All in One SEO

If you’re in any doubt, just leave this set to Enabled.

Next, we’re going to decide how many URLs are listed in each sitemap.

When Sitemap Indexes are enabled, you’ll see a setting for Links Per Sitemap.

Links Per Sitemap setting in All in One SEO

We limit each sitemap page to 1,000 URLs. If you have more than 1,000 URLs for any type of content, we’ll split the sitemap into pages, with 1,000 URLs in each page.

This helps to reduce the time it takes to create each sitemap so that search engines don’t give up when it takes too long.

You can typically leave this setting alone. If it’s taking too long to view your sitemap pages then lower this number.

The next setting is Automatically Ping Search Engines. This will enable All in One SEO to notify search engines when your content has changed. Typically you’ll want to leave this set to Yes.

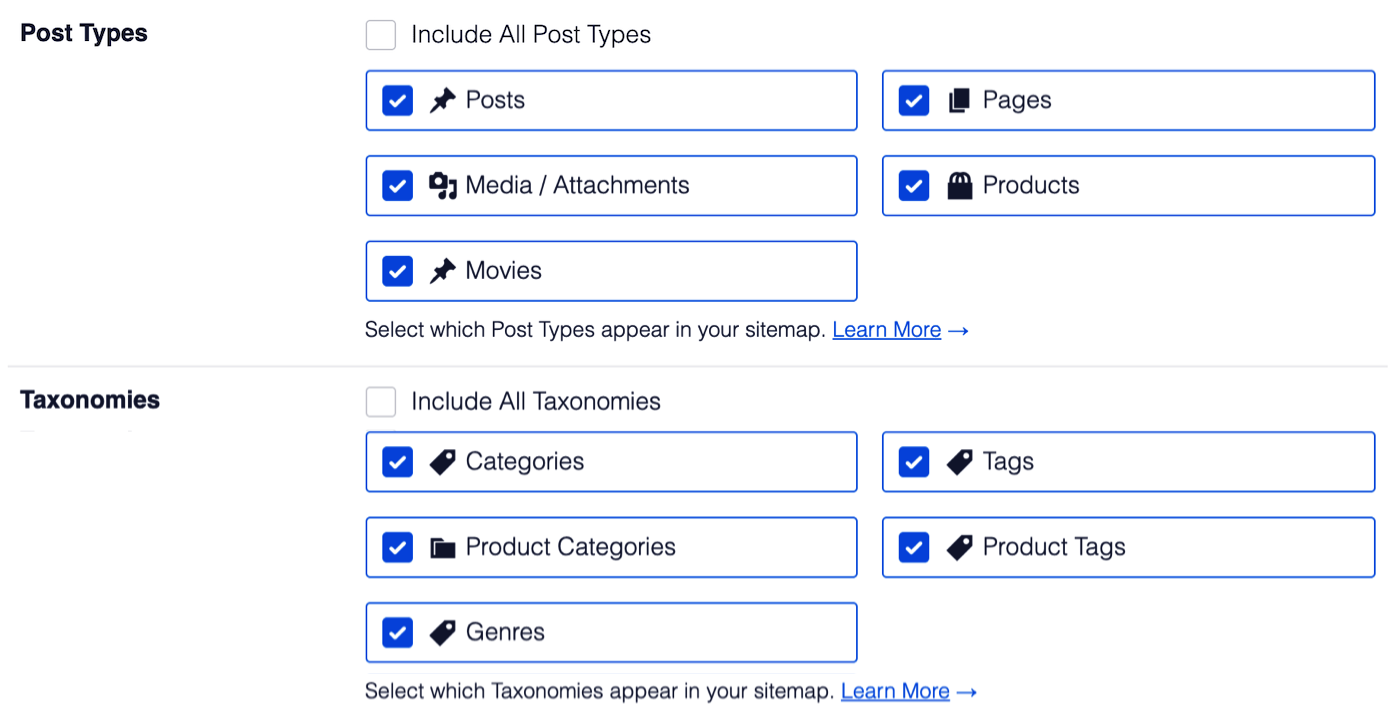
Next, we’re going to decide what content we want to include in our sitemap. There are two settings here, Post Types and Taxonomies. If you want to include all your content then you can leave the Include All Post Types and Include All Taxonomies check boxes set to checked. If you uncheck these two check boxes you’ll see a list of all your content post types and taxonomies and can select which to include in your sitemap.

Post Types and Taxonomies options in XML Sitemap settings

Important:
Any content that has been set to be excluded from search results or set to No index under Search Appearance will not appear in these settings.

The last two settings are for date archives and author archives that are created by WordPress when you’ve published posts. We normally don’t include these in the sitemap because they have little value in search results. If you do want to include these in your sitemap then you can enable these settings.

Note:
Search engines can still index your content and display it in search results even if its not included in your sitemap. Including content in your sitemap just means it’ll be added, updated and deleted on search engines much faster than waiting until they find your content on your own.

The post How to Create an XML Sitemap first appeared on AIOSEO.

Setting the SEO Title and Description for Your Content

$
0
0

Do you want to set the SEO Title and Description for your content?

This article will walk you through the easy steps to do this.

The instructions in this article apply to Posts, Pages, Media Attachments, any Custom Post Types, Categories, Tags and any Custom Taxonomies. We’re using the Add New Post screen in the screenshots below.

To get started, edit your content and scroll down to the AIOSEO Settings. You should see the Snippet Preview, as well as the Title and Meta Description settings.

SEO settings in the AIOSEO Settings section on the Edit Post screen

The Snippet Preview shows an example of how your content may look in search results based on the Title and Meta Description you set.

Setting the SEO Title

To set the SEO title for this content, click on one of our smart tags shown above the Title field.

Adding a smart tag to the Post Title field

You can also type the hash character ( # ) in the field to display a list of available tags you can choose from.

Typing the hash symbol displays a list of available tags to choose from

You can also enter text in the Title field or combine text with the smart tags to give you ultimate control over the SEO title. Whatever you set will override the format set under All in One SEO » Search Appearance.

Setting the SEO Description

To set the SEO description for this content, click on one of our smart tags shown above the Meta Description field.

You can also type the hash character ( # ) in the field to display a list of available tags you can choose from.

Meta Description field in Home Page Settings

You can also enter text in the field or combine text with smart tags to give you ultimate control over the SEO description. Whatever you set will override the format set under All in One SEO » Search Appearance.

That’s all! You’ve now set the SEO title and description for your individual content.

The post Setting the SEO Title and Description for Your Content first appeared on AIOSEO.

Beginners Guide for All in One SEO

$
0
0

Welcome to All in One SEO and thank you for choosing the most popular WordPress SEO plugin. This Beginners Guide will walk you through the essential first steps to take after installing the plugin.

If you haven’t already installed All in One SEO Pro, please refer to the installation instructions.

All in One SEO works very well out of the box with the default settings, however, the steps below will guide you through some important configuration settings that every site owner should follow.

Step 1 – Setting Your Home Page SEO Meta

To set the SEO title and meta description for your homepage, please follow the steps in our article on Setting the SEO for Your Home Page.

Step 2 – Setting Your Person or Organization Details

To set the Person or Organization details for your site, please follow the steps in our article on Configuring the Schema Settings in All in One SEO.

Step 3 – Showing or Hiding Your Content in Search Results

To control which content you want to appear in search results, please follow the steps in our article on Showing or Hiding Your Content in Search Results

Step 4 – Setting the SEO Meta for Your Content

To set the SEO title and meta description for your posts and pages, please follow the steps in our article on Setting the SEO Title and Description for Your Content.

Next Steps

The steps you have followed above are the essential first steps for every site owner.

Next you should create an XML Sitemap by following our Beginners Guide to XML Sitemaps.

After that, you may wish to enable the Social Meta module and follow the steps in the Beginners Guide to Social Networks Settings for Facebook .

If you’re interested in learning about all of the other settings and features in All in One SEO then review the plugin documentation or click on the Help links and icons in the plugin.

The post Beginners Guide for All in One SEO first appeared on AIOSEO.

Installing All in One SEO Pro

$
0
0

Before installing All in One SEO Pro on your site, you first need to download it to your computer.

Start by logging into our website here – https://aioseo.com/login/.

You should have received a purchase receipt email from us that contains your username and password.

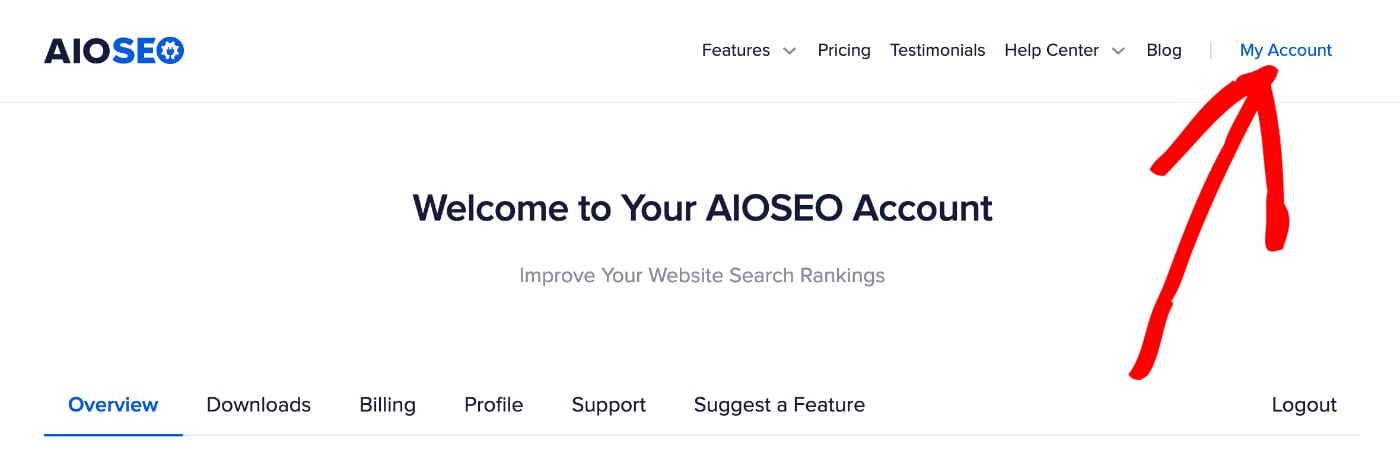
Next, click the My Account link in the top right corner of our site. 

My Account link in the top right corner of aioseo.com

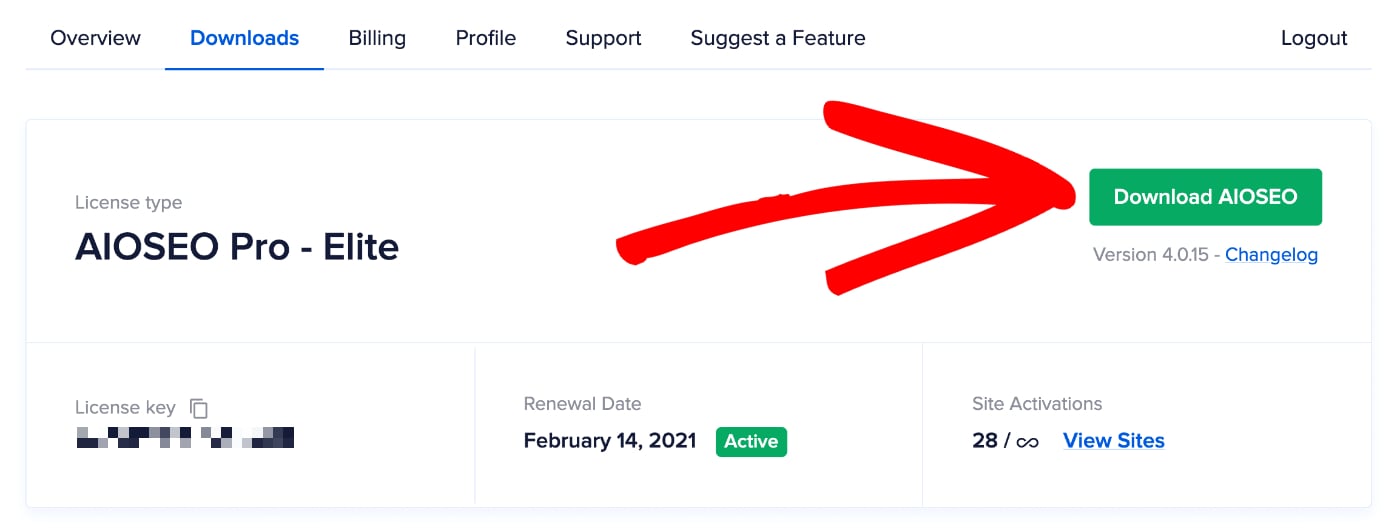
Next, click on the Downloads tab and then click the Download AIOSEO button. 

Download AIOSEO button on the Downloads screen

A ZIP file called all-in-one-seo-pro.zip will download to your computer.

Now, you need to upload the ZIP file to your WordPress site.

To do this, log in to your WordPress site and go to Plugins and click on the Add New button.

Add New button on the Plugins screen in WordPress

Then click the Upload Plugin button at the top of the screen.

Upload Plugin button in WordPress

Click the Choose File button and browse your computer for the downloaded ZIP file of All in One SEO Pro.

Choose File button in WordPress

Once you’ve found it, select it and click the Install Now button.

Install Now button in WordPress

Once the plugin has installed, click on the Activate Plugin button.

Activate Plugin button in WordPress

Please note that activating the Pro version will automatically import all SEO data and configuration settings from the free version with no data loss. Once you’ve activated the Pro version, the free version will be automatically deactivated and you can delete it.

Finally, click on General Settings in the All in One SEO menu and enter your license key which you received in your purchase receipt in the License Key field.

NOTE:  If you get an error message related to maximum upload file size whist installing All in One SEO Pro, the refer to the instructions here.

The post Installing All in One SEO Pro first appeared on AIOSEO.
aioseo_flush_output_buffer

$
0
0

Purpose

This filter can be used to control whether AIOSEO flushes the output buffer after rewriting the title. You can disable this to fix conflicts with other plugins that also do output buffering at the same time.

Arguments (1)

  1. $enabled (boolean) – Whether AIOSEO should flush the output buffer after rewriting the title. Defaults to true.

Example code snippet

add_filter( 'aioseo_flush_output_buffer', '__return_false' );
The post aioseo_flush_output_buffer first appeared on AIOSEO.

Unable to Save Settings Due to Cloudflare Firewall Rules

$
0
0

If you use Cloudflare and you’re having a problem saving settings in All in One SEO, including adding your license key in AIOSEO Pro, then you may be getting blocked by the firewall rules in Cloudflare.

Follow these steps to add a rule to allow AIOSEO to save settings:

First, log into your Cloudflare account and click on Page Rules in the top of the screen.

Click the Create Page Rule button and add the URL shown below, making sure to replace https://mydomain.com/ with the URL for your site:

https://mydomain.com.br/wp-json/aioseo/*

In the drop down, select Disable Security and then click Save and Deploy.

Your new Page Rule should look like this:

Now go back to All in One SEO on your site and make sure you can save changes to settings.

If you’re still not able to save settings then please contact us for support here.

The post Unable to Save Settings Due to Cloudflare Firewall Rules first appeared on AIOSEO.

Getting Keyphrase Suggestions From Semrush

$
0
0

In All in One SEO, you can add a Focus Keyphrase that the plugin will use to analyze your on-page SEO. This enables you to ensure your content and SEO is relevant to the phrase you’re writing about.

As of version 4.0.16, you can now get suggestions for keyphrases from our partners at Semrush.

To use this feature, first edit your content and scroll down to the AIOSEO Settings section.

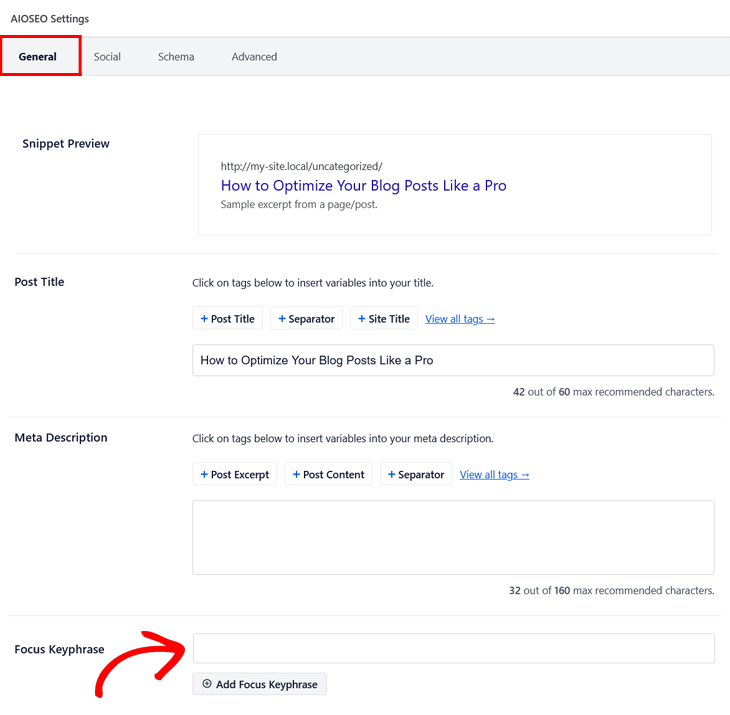
Type your keyphrase in the Focus Keyphrase field and click the Add Focus Keyphrase button.

Once you’ve added your Focus Keyphrase, you should see a Get Additional Keyphrases button below the results for your Focus Keyphrase.

Click this button to open the Semrush window where you can log into your Semrush account or register for a free account.

Follow the steps to log in or register.

Next, you should see a request from Semrush to connect your website to your Semrush account. Click the Approve button.

Now you’ll see a table showing the related keyphrases to your Focus Keyphrase, and to the right of each keyphrase you’ll see the volume of search impressions for that keyphrase and a trend graph.

If you have AIOSEO Pro, you will see an Add Keyphrase button, click this to add the keyphrase to All in One SEO.

You will now see results showing how relevant your content and SEO is to this phrase and recommendation for improvements.

The post Getting Keyphrase Suggestions From Semrush first appeared on AIOSEO.

Understanding the TruSEO Page Analysis Recommendations

$
0
0

When you create content on your site, All in One SEO will display a TruSEO Score along with recommendations in the Page Analysis section.

These recommendations may help you improve your on-page SEO and content.

Here is a full list of the recommendations along with how to implement them:

Basic SEO

  • Meta description length: We recommend that you provide a brief description of your page or post in the Meta Description field. This description should be a minimum of 120 characters and no longer than 160 characters.
  • Content length: We’re looking for a minimum of 300 words for this check to pass. Not all content will have 300 words or more so this check can be safely ignored. It’s best to focus on the quality of your content rather than the number of words.
  • Internal links: Good content should have internal links to related pages on your site. We recommend that you add at least one internal link.
  • External links: External links aren’t as important as internal links and not all content will have external links. Where relevant and possible, you should consider adding links to related content outside your site.

Title

  • SEO title length: We recommend that your SEO title should be a minimum of 40 characters and no longer than 60 characters.

Readability

  • Images/Videos in content: Google has found that content that contains images or videos gets more visitors and improves visitor time on page. You’re encouraged to add relevant images and videos to your content where relevant and possible.
  • Paragraph length: We’re looking for paragraphs that have more than 120 words because these make it more difficult to engage your visitors which reduces time on page.
  • Sentence length: This checks for long or short sentences in your content. The recommended word count is 20. This makes content more readable for your visitors.
  • Passive voice: This checks for active voice versus passive voice. A good article about active vs passive voice can be found on Grammarly here.
  • Transition words: This checks to see if your content contains transition. A good article about transition words can be found on Grammarly here.
  • Consecutive sentences: This checks to see if you’re using the same word at the start of more than one sentence in a row. It helps you avoid repetition in your content.
  • Subheading distribution: This checks to see if you’re breaking up long content with H2 and H3 headings. We look for content of more than 300 words that doesn’t contain an H2 or H3 heading. These headings help visitors read content by separating out long plain text into logical sections with section titles (headings).
  • Flesch reading ease: This uses the commonly used Flesch-Kincaid readability tests to check how easy it is to read your content.

Keyphrase Checks

  • Keyphrase in meta description: This checks to see if the keyphrase you have entered appears in your meta description. The keyphrase must match exactly. Words cannot be separated, they must appear exactly as you typed them in the Keyphrase fields.
  • Keyphrase in title: This checks to see if the keyphrase you have entered appears in your SEO title. The keyphrase must match exactly.
  • Keyphrase in URL: This checks to see if the keyphrase you have entered appears in the URL. The keyphrase must match exactly.
  • Keyphrase in introduction: This checks to see if the keyphrase you have entered appears in the first sentence of your content. The keyphrase must match exactly.
  • Keyphrase in subheadings: This checks to see if the keyphrase you have entered appears in any H2 or H3 headings. The keyphrase must match exactly.
  • Keyphrase in introduction: This checks to see if the keyphrase you have entered appears in the first sentence of your content. The keyphrase must match exactly.
  • Keyphrase in image Alt: This checks to see if the keyphrase you have entered appears in the Alt text for your images. The keyphrase must match exactly.
  • Keyphrase in content: This checks to see if the keyphrase you have entered appears in your content. The keyphrase must match exactly.
  • Keyphrase at the beginning of SEO title: This checks to see if the keyphrase you have entered appears in the first few words of your SEO title. The keyphrase must match exactly.
  • Keyphrase length: This checks to see if your keyphrase contains more than four words.

The post Understanding the TruSEO Page Analysis Recommendations first appeared on AIOSEO.
aioseo_schema_graphs

$
0
0

Purpose

This filter can be used to filter the JSON schema graphs (rich snippets) that AIOSEO outputs for the page.

Arguments (1)

  1. $graphs (array) – The names of graphs that will be output.

Example code snippet

The code snippet below is just an example of how this filter can be used. In the example below, Article is added to the list of graphs that will be output for posts.

add_filter( 'aioseo_schema_graphs', 'aioseo_filter_schema_graphs' );

function aioseo_filter_schema_graphs( $graphs ) {
   if ( is_singular( 'post' ) && ! in_array( 'Article', $graphs, true ) ) {
      $graphs[] = 'Article';
   }
   return $graphs;
}
The post aioseo_schema_graphs first appeared on AIOSEO.

aioseo_conflicting_shortcodes

$
0
0

Purpose

This filter can be used to filter the list of conflicting shortcodes that AIOSEO does not parse.

Arguments (1)

  1. $conflictingShortcodes (array) – The list of conflicting shortcodes.

Example code snippet

The code snippet below is just an example of how this filter can be used. In the example below, more shortcodes are added to the list of conflicting shortcodes.

add_filter( 'aioseo_conflicting_shortcodes', 'aioseo_filter_conflicting_shortcodes' );

function aioseo_filter_conflicting_shortcodes( $conflictingShortcodes ) {
   $conflictingShortcodes = array_merge( $conflictingShortcodes, [
		'WISDM Group Registration' => '[wdm_group_users]',
		'WISDM Quiz Reporting'     => '[wdm_quiz_statistics_details]',
		'WISDM Course Review'      => '[rrf_course_review]'
   ] );
   return $conflictingShortcodes;
}
The post aioseo_conflicting_shortcodes first appeared on AIOSEO.
Viewing all 404 articles
Browse latest View live


Latest Images